Pixelrat (обсуждение | вклад) (Новая страница: «==LSDj Wave Synth Deep Dive Part 1== ''Оригинальная статья на [https://chiptuneswin.com/blog/intense-tech-with-defense-mech-lsdj-wave-synth-de…») |
Pixelrat (обсуждение | вклад) (→LSDj Wave Synth Deep Dive Part 2) |
||
| (не показано 6 промежуточных версий этого же участника) | |||
| Строка 1: | Строка 1: | ||
| + | <div id="contentSub"><span class="subpages">Это руководство к [[LSDJ]]</span></div> | ||
==LSDj Wave Synth Deep Dive Part 1== | ==LSDj Wave Synth Deep Dive Part 1== | ||
''Оригинальная статья на [https://chiptuneswin.com/blog/intense-tech-with-defense-mech-lsdj-wave-synth-deep-dive-part-1/ chiptuneswin.com]''<br/> | ''Оригинальная статья на [https://chiptuneswin.com/blog/intense-tech-with-defense-mech-lsdj-wave-synth-deep-dive-part-1/ chiptuneswin.com]''<br/> | ||
| + | <spoiler> | ||
| + | Привет, я [[Defense Mechanism]]! Добро пожаловать в первый выпуск Intense Tech, где мы будет подробно рассматривать особенности LSDJ, в духе [[Paul’s LSDJ Tech Talk]]. Моя цель - передать знания и мудрость следующему поколению чипмузыкантов, создав тем самым армию блипающих мастеров! | ||
| + | |||
| + | В этом первом уроке вы получите понимание синтезатора WAV-канала! В частности, работу таких параметров, как Signal, Filter, Volume, Q и Cutoff. | ||
| + | |||
| + | Синтезатор WAV-канала является одной из самых запутанных и, возможно, пугающих фишек LSDJ. Надеюсь, что после прохождения этого и следующего упражнений вы не только обнаружите, что им легко пользоваться, но и приобретёте чёткое представление, как он работает, поймёте, что это одна из самых мощных сторон LSDJ! | ||
| + | |||
| + | Я подробно рассмотрю каждый параметр, чтобы демистифицировать то, что на самом деле происходит. Но давайте сначала начнём с краткого обзора самого WAV-канала. | ||
| + | |||
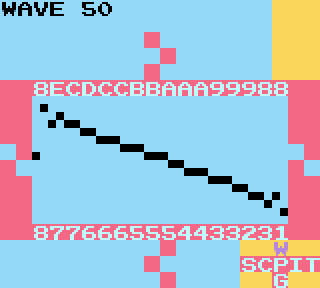
| + | WAV-канал воспроизводит 4-битную волну из 32 точек, что может быть представлено 32 цифрами в 16-ричном формате 0-F, как видно на скриншоте ниже | ||
| + | |||
| + | |||
| + | <center>[[Файл:Intense Tech with Defence Mech - file 1.png]]</center> | ||
| + | |||
| + | |||
| + | Для нас это означает, что каждая точка может иметь значение только от 0 до 15 (от 0 до F в 16-ричном формате). В то время как распространённый сегодня 16-битный звук допускает 65 536 уровней громкости, 4-битная глубина геймбоя допускает всего 16! Может показаться, что этого мало, но этого хватает, и это придаёт WAV-каналу характерный скрипучий звук. | ||
| + | |||
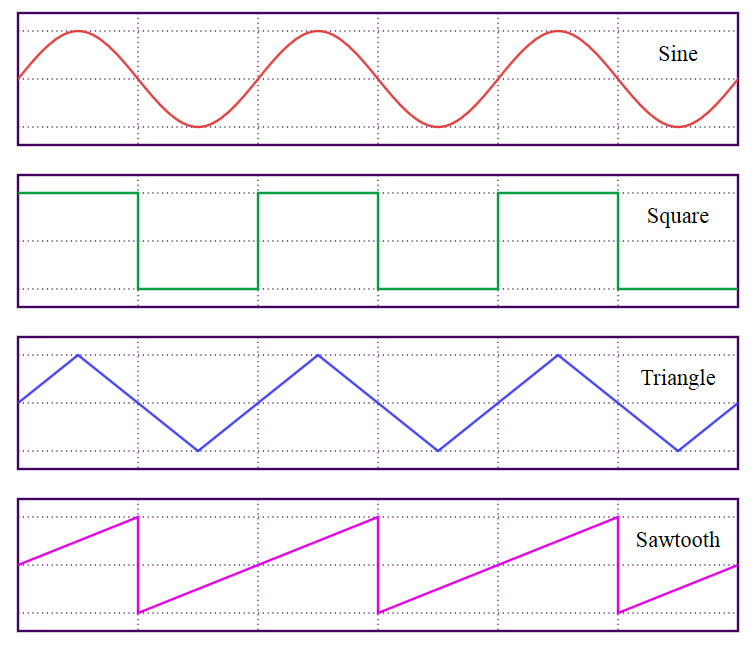
| + | Давайте начнем с рассмотрения основных форм звуковых сигналов, показанных на этом рисунке из Википедии: | ||
| + | |||
| + | |||
| + | <center>[[Файл:Intense Tech with Defence Mech - file 2.png]]</center> | ||
| + | |||
| + | |||
| + | К концу этого урока вы поймете, как создать синусоидальную волну, но прежде я должен дать некоторую теорию, как создается музыкальная нота. | ||
| + | |||
| + | Звук создаётся вибрирующим воздухом. Каждая форма волна, представленная выше, показывает, как выглядели бы эти вибрации, если бы мы могли их видеть. Можно представить их себе, вообразив как динамик ходит туда-сюда при воспроизведении звука. | ||
| + | |||
| + | Синусоидальная волна - основная форма волны, содержит чистую основную частоту основной ноты. Другие же формы волн содержать другие {{wiki|ru|Обертон|обертоны}} (кратные основной частоте). Комбинируя разные обертоны в разных соотношениях, мы можем создавать сигналы с разным звучанием (это называется изменением тембра самого звука). Вы слышите разницу в тембре между нотой, сыгранной на скрипке, и нотой, сыгранной на флейте, и это разница является результатом смешения разных обертонов, которые воспроизводятся в вибрирующем воздухе. | ||
| + | |||
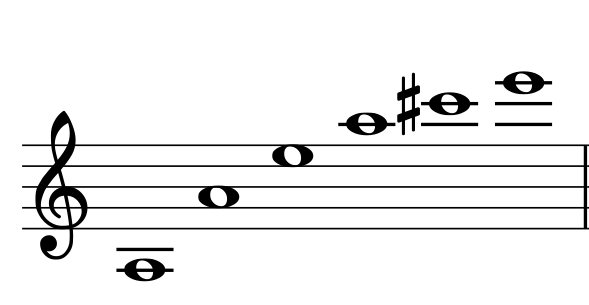
| + | Для примера обертона, если вы умножите частоту на 2, то получите ту же высоту звука, но на 1 октаву выше. При увелинии ещё на 1, вы создаёте следующий обертон. | ||
| + | |||
| + | Пример: A 220 Гц (LSDj A3) - фундаментальная, она же корневая нота<br/> | ||
| + | ''Наименования нот даны для версии LSDJ 6+, в версии 4 нужно добавить 1 октаву''<br/> | ||
| + | A 220 Гц x 2 = 440 Гц (LSDj A4) - на 1 октаву выше (1-й обертон)<br/> | ||
| + | A 220 Гц x 3 = E 660 Гц (LSDj E4) - 1 октава + 1 5-я (2-й обертон)<br/> | ||
| + | A 220 Гц x 4 = A 880 Гц (LSDj A5) - на 2 октавы выше (3-й обертон)<br/> | ||
| + | A 220 Гц x 5 = C # 1100 Гц (LSDj C # 5) - 2 октавы + 1 major 3rd (4-й обертон)<br/> | ||
| + | A 220 Гц x 6 = E 1320 Гц (LSDj E5) - 2 октавы + 1 5-я (6-й обертон)<br/> | ||
| + | |||
| + | |||
| + | <center>[[Файл:Intense Tech with Defence Mech - file 3.png]]<br/> | ||
| + | ''Первые 6 нот в {{wiki|ru|Натуральный_звукоряд|гармоническом ряду}} А 220 Гц''</center> | ||
| + | |||
| + | |||
| + | Гармонический ряд ноты включает в себя корневую ноту и ноты, полученные умножением основной частоты на 2, 3, 4 и т.д.<br/> | ||
| + | Каждый множитель, кратный 2, представляет октаву основной частоту. | ||
| + | Каждый множитель, кратный 3, представляет одну 5-ю выше основной частоты (кроме множителя 9 и его кратных, которые представляют major 10th)<br/> | ||
| + | Каждый множитель, кратный 5, представляет собой major 3rd над основной частотой.<br/> | ||
| + | Некоторые нечётный множители не соответствуют традиционным нотам. Так, множитель 7 - это не-в-тон minor 7th, а 11 - flat 5th. | ||
| + | |||
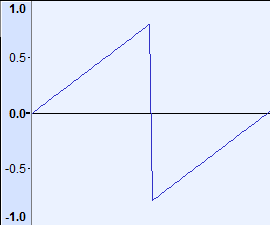
| + | По умолчанию в LSDJ установлена пилообразная пила, которая создаются, когда синусоидальные волны всех нот в гармоническом ряду объединяются вместе. | ||
| + | |||
| + | |||
| + | <center>[[Файл:Intense Tech with Defence Mech - file 4.png]]<br/> | ||
| + | ''Один полный цикл пилообразной волны, генерируемой в Audacity''</center> | ||
| + | |||
| + | |||
| + | <center>[[Файл:Intense Tech with Defence Mech - file 1.png]]<br/> | ||
| + | ''Один полный цикл пилообразной волны, генерируемой в LSDJ''</center> | ||
| + | |||
| + | Давайте послушаем аудиопример, где сначала идёт пила из Audacity, а потом из LSDJ. | ||
| + | |||
| + | |||
| + | <center>{{Audio:http://chipwiki.ru/music/intensetechwithdefencemech/sawtooth.mp3}}<br/> | ||
| + | [[Файл:Intense Tech with Defence Mech - file 5.png]]<br/> | ||
| + | ''Сравнение волн''</center> | ||
| + | |||
| + | |||
| + | Небольшая разница есть, но в целом LSDJ-версия звучит высококачественно. | ||
| + | |||
| + | На экране синтезатора пила представлена как [[Файл:Intense Tech with Defence Mech - file 6.png]] | ||
| + | |||
| + | Квадратная волна [[Файл:Intense Tech with Defence Mech - file 7.png]] строится путем объединения синусоидальных колебаний гармонического ряда нечетных обертонов. Большинству из нас, вероятно, знаком чёткий писк прямоугольной волны, который получается в импульсных каналах, настроенных с рабочим циклом 50%. | ||
| + | |||
| + | Треугольная волна [[Файл:Intense Tech with Defence Mech - file 8.png]] строится так же, как и квадратная, используя только нечетные гармоники, но чем тише они становятся, тем они становятся выше. Треугольная волна хорошо подходит для очень глубоких басов. Возможно, вы её знаете по треугольному каналу приставки [[NES]]. | ||
| + | |||
| + | Может показаться, что сделать синусоидальную волну в LSDJ невозможно, так как параметр "Signal" имеет всего 3 варианта, среди которых синус явно отсутствует. Однако каждая из этих форм волны построена из синусоидальной, и я могу показать вам, как извлечь синусиоиду из любого из этих вариантов. | ||
| + | |||
| + | Нам нужен параметр "Filter", который так удобно оказался следующим на экране синтезатора. | ||
| + | |||
| + | "Filter" имеет три параметра: {{Подсказка|Lowpass|фильтр нижних частот}} (Lowp), {{Подсказка|Highpass|фильтр верхних частот}} (Highp), {{Подсказка|Bandpass|фильтр, пропускающий только указанные частоты}} (Bandp) и {{Подсказка|Allpass|фильтр, пропускающий все частоты, кроме указанных}} (Allp). | ||
| + | |||
| + | Если вам знакомы традиционные фильтры с аналоговых синтезаторов или цифровых плагинов, то вы поймёте, что это. Если нет, то можете думать о фильтре в LSDJ, как о штуке, которая позволяет вам выбирать, какие гармоники в звуке вы хотели бы создать в результирующей форме волны. Частота, с которой работает фильтр, выбирается параметром "Cutoff". | ||
| + | |||
| + | При использовании Lowpass через фильтр "пропускаются" только низкие гармоники, до Cutoff, а это означает, что ваша основная частота является самым низким тоном, но можно расширится до высоких гармоник (теоретечиески в LSDj это до 15 обертонов). При Highpass через фильтр будут проходить только гармоники выше Cutoff, но можно расшириться до самых низких. При Bandpass через фильтр будет проходить только тот диапазон гармоник, что указан в Cutoff, а вот при Allpass будут проходить все гармоники, но фазы некоторых будут смещены в месте, обозначенном значением Cutoff, что приведёт к другому тембру. | ||
| + | |||
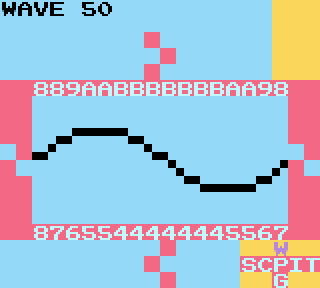
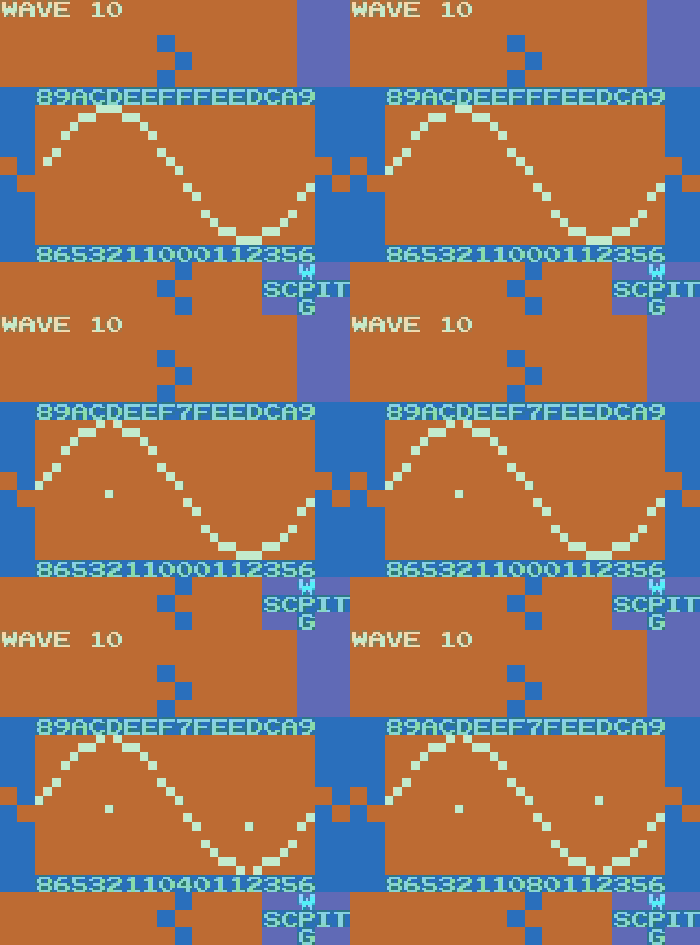
| + | Давайте перейдём от сухого объяснения к просмотру, что происходит, когда мы устанавливаем значение среза Cutoff нашего низкочастотного фильтра Lowpass равное 10. Так как это 0x10 (16 в шестнадцатеричном формате) из возможных 0xFF (255 в шестнадцатеричном формате), то фильтр установлен на пропуск самой низкой, фундаментальной, ноты в гармоническом ряду. Помните, что если вы хотите слышать только первую часть волны из синтезатора, установите Play на Manual на экране Wave Instrument. | ||
| + | |||
| + | |||
| + | <center>[[Файл:Intense Tech with Defence Mech - file 9.png]]<br/> | ||
| + | ''Появляется дикая синусоида!''</center> | ||
| + | |||
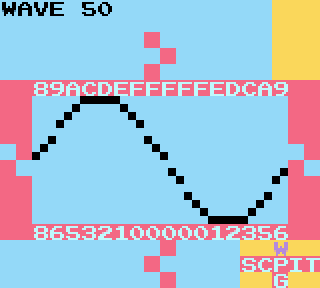
| + | Мы можем видеть, что это выглядит немного раздавлено, так что давайте увеличим Q, также известный как резонанс. Этот параметр даст нам увеличение громкости в области, установленной фильтром, в то время как остальные гармоники останутся на том же уровне. Установим Q в 1, чтобы увеличить громкость фундаментальной ноты и посмотрим, что будет: | ||
| + | |||
| + | |||
| + | <center>[[Файл:Intense Tech with Defence Mech - file 10.png]]</center> | ||
| + | |||
| + | |||
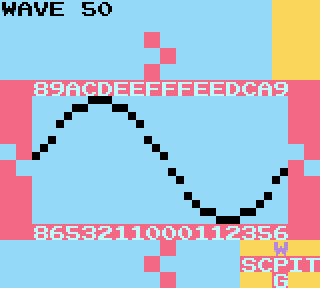
| + | Получилось что-то между синусоидой и придавленным треугольником. Давайте уменьшим громкость до 08 и увеличим Q до 3. Параметр громкости регулирует общую громкость сигнала до прохода через фильтр и Q. | ||
| + | |||
| + | |||
| + | <center>[[Файл:Intense Tech with Defence Mech - file 11.png]]</center> | ||
| + | |||
| + | |||
| + | Теперь это похоже на синусоидальную волну! Не бойтесь экспериментировать с разными значениями Q, Cutoff и Volume и настраивать их по своему вкусу. | ||
| + | |||
| + | Проигрывание нот на низких октавах с этой формой волны даёт самый низкий, самый басовый звук, какой только можно получить на канале WAV. Он содержит наименьшее количество возможных обертонов, что делает его идеально подходящим для низких ударов и бочек. В самой идеальной ситуации синусоида вообще не содержит обертонов, только фундаментальную частоту, однако, поскольку битовая глубина WAV-канала даёт нам только 16 уровней громкости, мы можем лишь приблизительно приблизиться к синусоидальной волне, и некоторые обертноы проникают в звук. | ||
| + | |||
| + | |||
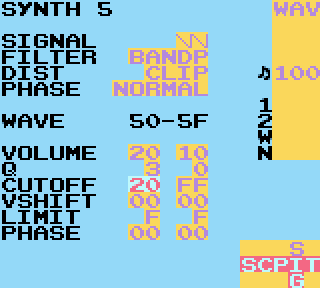
| + | Завершая урок, скажу, что каждое кратное 10 значение Cutoff фактически представляет собой 1 обертон гармонического ряда. Это становится ещё яснее, когда мы изменяем Lowpass на Bandpass и увеличиваем нашу громкость до 20. Обратите внимание, если вы установите Cutoff на 20, то услышите обертон на 1 октаву выше. Если установите Cutoff на 30, услышите обертон 1 октавы + одну 5-ю выше. | ||
| + | |||
| + | Поднимая Cutoff, вы можете поэкспериментировать с увеличением значения Q, чтобы ещё больше подчеркнуть выбранный обертон: чем выше Cutoff, тем меньше будет громкость результирующего обертона (это особенность того, как продуцируется пилообразный сигнал). | ||
| + | |||
| + | |||
| + | <center>[[Файл:Intense Tech with Defence Mech - file 12.png]]</center> | ||
| + | |||
| + | |||
| + | И помните, что если вы измените свою форму волны на квадрат или треугольник, то может показаться, что некоторые октавы или другие обертоны отсутствуют! Так происходит из-за того, что в этих сигналах меньше обертонов. | ||
| + | |||
| + | |||
| + | Cutoff на 20: | ||
| + | |||
| + | <center>[[Файл:Intense Tech with Defence Mech - file 13.png]]<br/> | ||
| + | {{Audio:http://chipwiki.ru/music/intensetechwithdefencemech/cutoff20.mp3}}</center> | ||
| + | |||
| + | |||
| + | Cutoff на 30: | ||
| + | |||
| + | <center>[[Файл:Intense Tech with Defence Mech - file 14.png]]<br/> | ||
| + | {{Audio:http://chipwiki.ru/music/intensetechwithdefencemech/cutoff30.mp3}}</center> | ||
| + | |||
| + | |||
| + | Cutoff на 40: | ||
| + | |||
| + | <center>[[Файл:Intense Tech with Defence Mech - file 15.png]]<br/> | ||
| + | {{Audio:http://chipwiki.ru/music/intensetechwithdefencemech/cutoff40.mp3}}</center> | ||
| + | |||
| + | |||
| + | Видите закономерность в результирующих формах волны, когда мы увеличиваем Cutoff? Запомните это, так как мы будет использовать её в следующем уроке! | ||
| + | </spoiler> | ||
==LSDj Wave Synth Deep Dive Part 2== | ==LSDj Wave Synth Deep Dive Part 2== | ||
''Оригинальная статья на [https://chiptuneswin.com/blog/intense-tech-with-defense-mech-lsdj-wave-synth-deep-dive-part-2/ chiptuneswin.com]''<br/> | ''Оригинальная статья на [https://chiptuneswin.com/blog/intense-tech-with-defense-mech-lsdj-wave-synth-deep-dive-part-2/ chiptuneswin.com]''<br/> | ||
| + | |||
| + | <spoiler text="В процессе перевода"> | ||
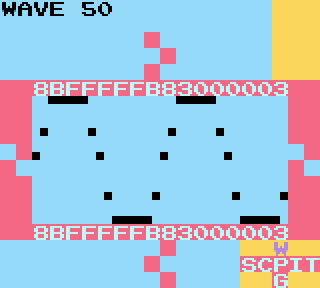
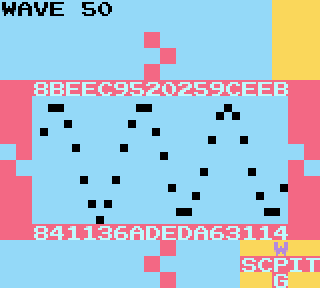
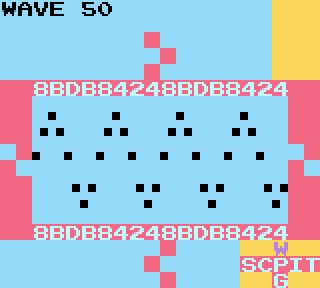
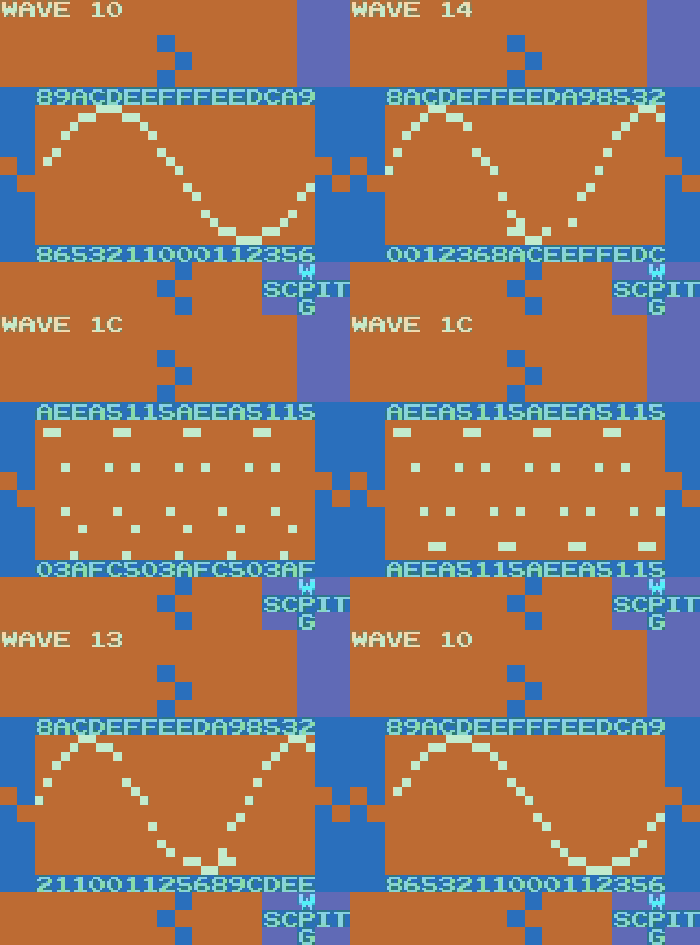
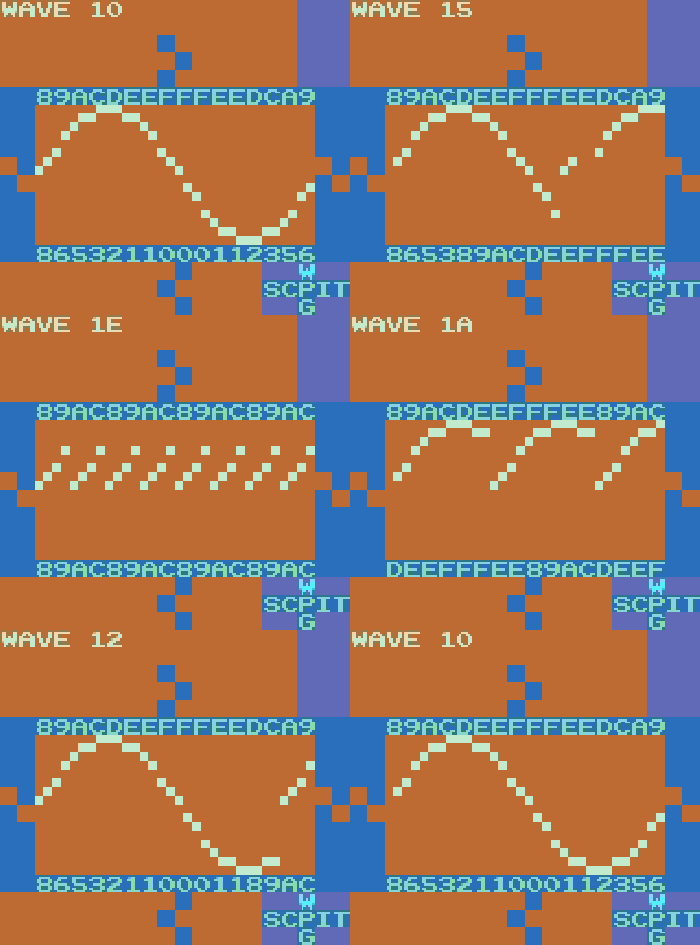
| + | In this tutorial we’ll continue covering what one needs to understand the Wave channel synth! Last time we covered Signal, Volume, Filter, Cutoff, and Q. This time we’re specifically getting into the wave synth parameters of Dist, Phase, Vshift, and Limit. We’re going to show you how to add some real noisy crunch to your wave sounds! By the end you should have a great idea of how to get any kind of sound out of the wave channel, from a silky smooth lead to a gnarly crunchy bass. | ||
| + | |||
| + | In part 1, I talked about how different filter settings affect what harmonics are produced in the wave channel. As we have seen, the more cycles we have of a waveform in the wave frame, the higher the harmonic that will be produced. In fact, the number of cycles corresponds to the number of the harmonic that will play. | ||
| + | |||
| + | If you’ve taken a look at the settings on your own or read the LSDj manual, you might have found another way to change the number of cycles: by changing the Phase. | ||
| + | |||
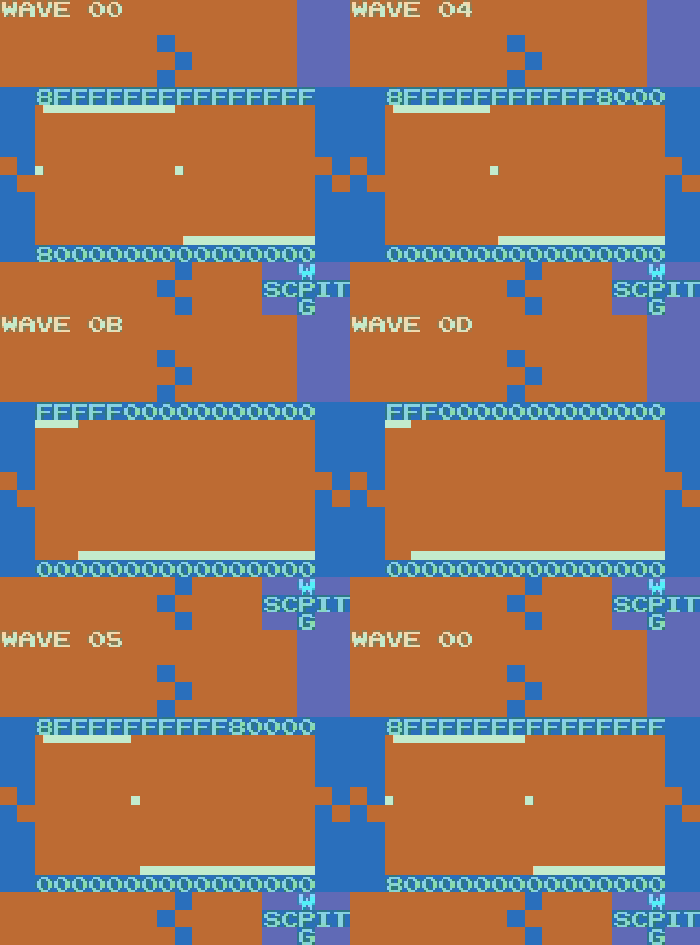
| + | The Phase parameter in LSDj compresses the shape of the waveform horizontally. When the Phase type is Normal, increasing the Phase value above 0 will compress the entire waveform, adding samples at volume 0 at the end. In this way, it is analogous to changing pulse width, aka duty cycle. In fact, a common technique to get a smoothly modulated pulse lead (commonly associated with the C64 SID, for example) is to set the Signal to Square, keep Phase type set to Normal, set the start Phase value to 00, and the end Phase to 1F (or 1E in version 4). | ||
| + | |||
| + | |||
| + | <center>[[Файл:Intense Tech with Defence Mech 2 - file 1.gif]]<br/> | ||
| + | ''SID lead with Phase Normal''<br/><br/> | ||
| + | {{Audio:http://chipwiki.ru/music/intensetechwithdefencemech/2-1.mp3}}</center> | ||
| + | |||
| + | |||
| + | For an interesting vocal-like lead, try this with Triangle instead of Square. | ||
| + | |||
| + | If we change the Phase type to Resync, we’ve just given ourselves another way to add new overtones similar to changing the Cutoff of the wave. Resync, instead of compressing the waveform once and adding 0-value samples at the end, repeats the waveform until all 32 samples are filled. | ||
| + | |||
| + | |||
| + | <center>[[Файл:Intense Tech with Defence Mech 2 - file 2.gif]]<br/><br/> | ||
| + | {{Audio:http://chipwiki.ru/music/intensetechwithdefencemech/2-2.mp3}}</center> | ||
| + | |||
| + | ''(note: in version 4 of LSDj, Phase 1F is usually silent, so this waveform would have to be input manually)'' | ||
| + | |||
| + | You can also experiment with Resync2, which like Resync repeats the waveform to fill the wave frame, but does not compress it. This normally has the effect of lowering the volume, as when you only loop a part of the waveform, it typically doesn’t reach as high or low as it normally would. However, the loss of volume complements additional harmonics comprised in the waveform. | ||
| + | |||
| + | |||
| + | <center>[[Файл:Intense Tech with Defence Mech 2 - file 3.gif]]<br/><br/> | ||
| + | {{Audio:http://chipwiki.ru/music/intensetechwithdefencemech/2-3.mp3}}</center> | ||
| + | |||
| + | Up to now, our changes to the waveforms have resulted in a fairly clean sound. Overtones have a smooth, clear sound. But what if we really want to add some grit? We’re gonna have to get down and dirty to make our sine wave turn into something like this: | ||
| + | |||
| + | |||
| + | <center>[[Файл:Intense Tech with Defence Mech 2 - file 4.gif]]<br/><br/> | ||
| + | {{Audio:http://chipwiki.ru/music/intensetechwithdefencemech/2-4.mp3}}</center> | ||
| + | |||
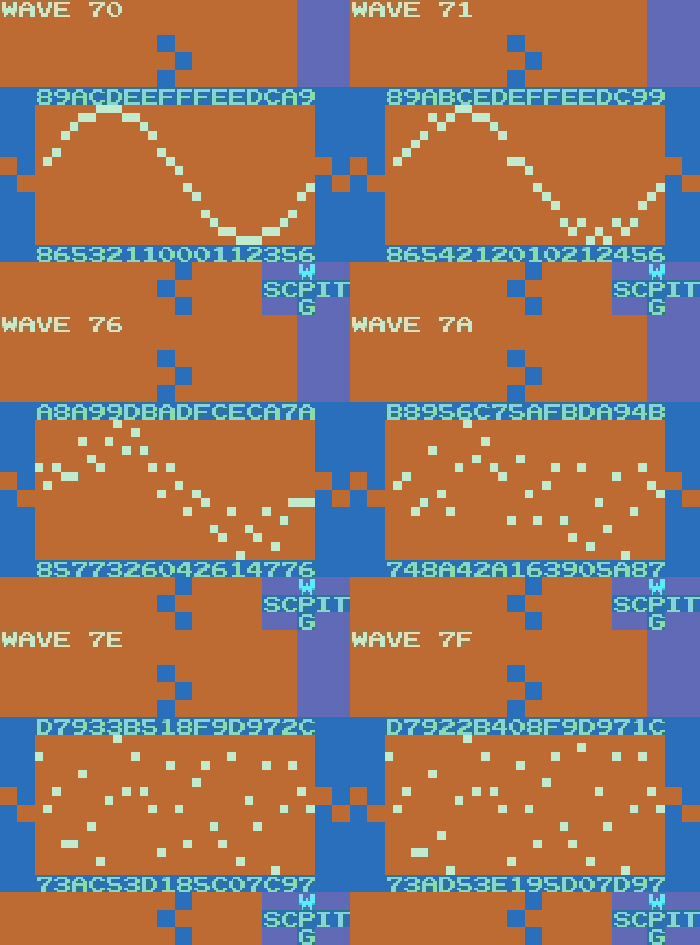
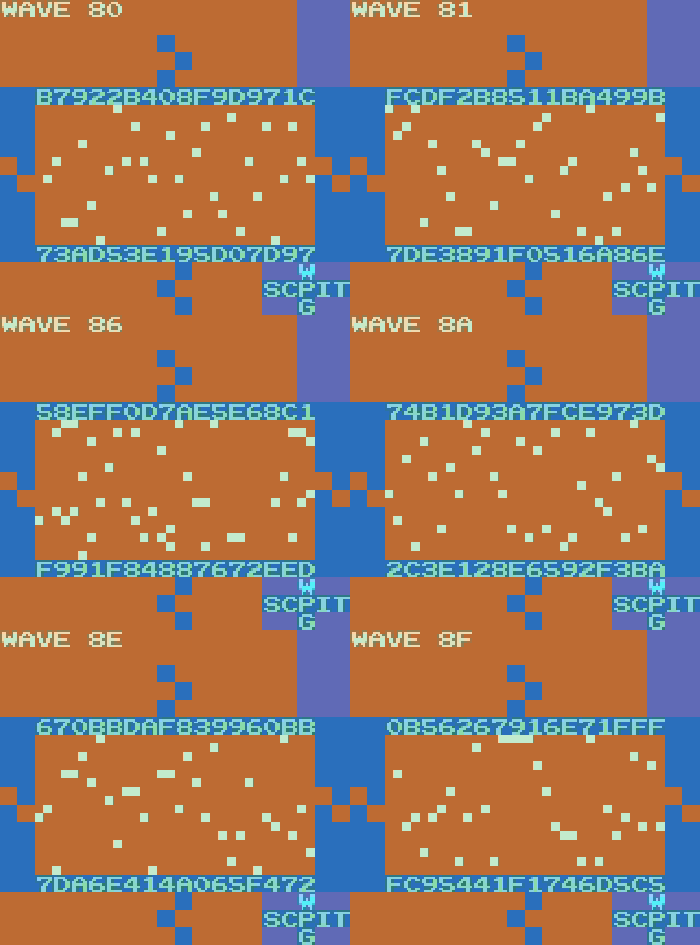
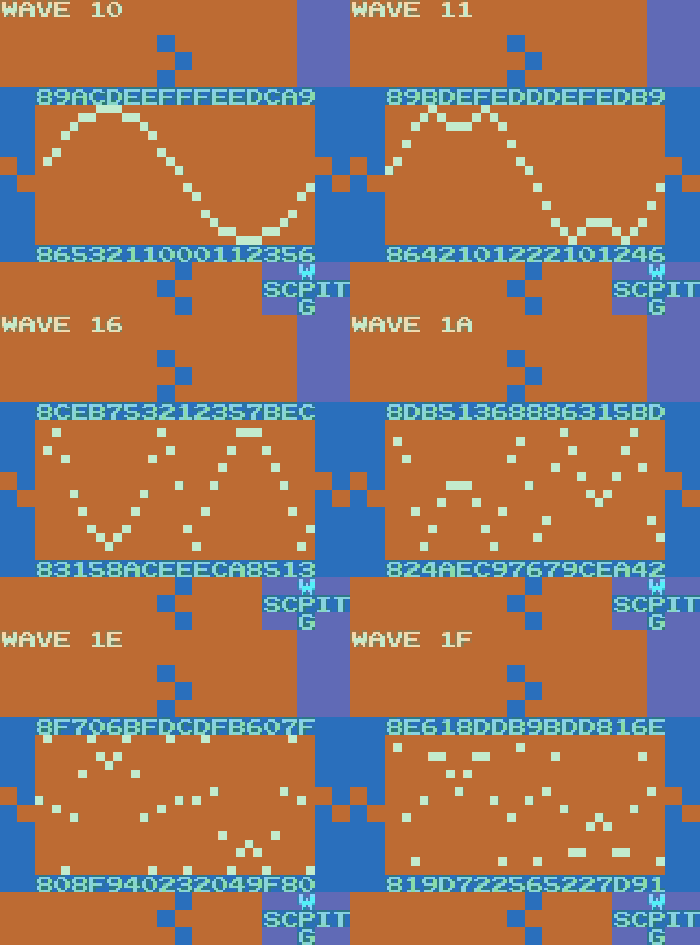
| + | The last frame of the synth above is what pure noise looks like in the wave channel. The noisier the waveform gets, the more the overtones are combined differently to add more grit. Here’s an example of what 16 different frames of pure noise sound like: | ||
| + | |||
| + | |||
| + | <center>[[Файл:Intense Tech with Defence Mech 2 - file 5.gif]]<br/><br/> | ||
| + | {{Audio:http://chipwiki.ru/music/intensetechwithdefencemech/2-5.mp3}}</center> | ||
| + | |||
| + | So how do we add this noise to our waveforms? One way is by essentially adding extra “notches”. This can be done manually, like adding some extra grit to a normal sine wave. | ||
| + | |||
| + | |||
| + | <center>[[Файл:Intense Tech with Defence Mech 2 - file 6.gif]]<br/><br/> | ||
| + | {{Audio:http://chipwiki.ru/music/intensetechwithdefencemech/2-6.mp3}}</center> | ||
| + | |||
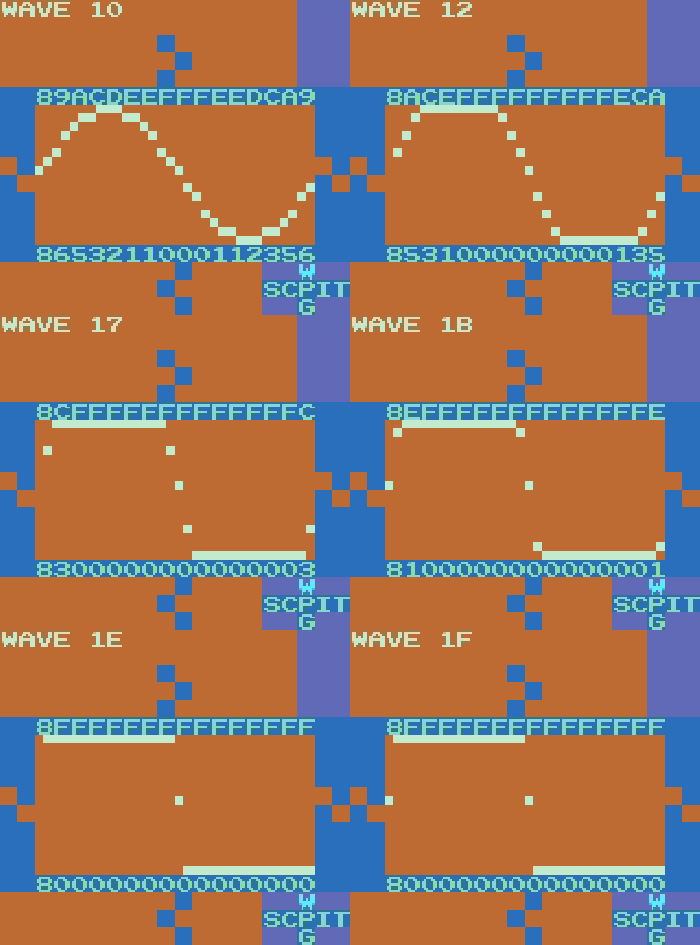
| + | Dist (Distortion) type also affects wave noise content. Distortion in LSDj refers to what happens when the waveform exceeds the available dynamic range, that is, what happens when increasing a waveform’s Volume or Q takes it beyond the maximum volume. As you’ll recall, volume is represented by the values 0-F. If the peak volume of the signal goes higher than F or lower than 0, the Dist type of the waveform dictates how LSDj reacts. | ||
| + | |||
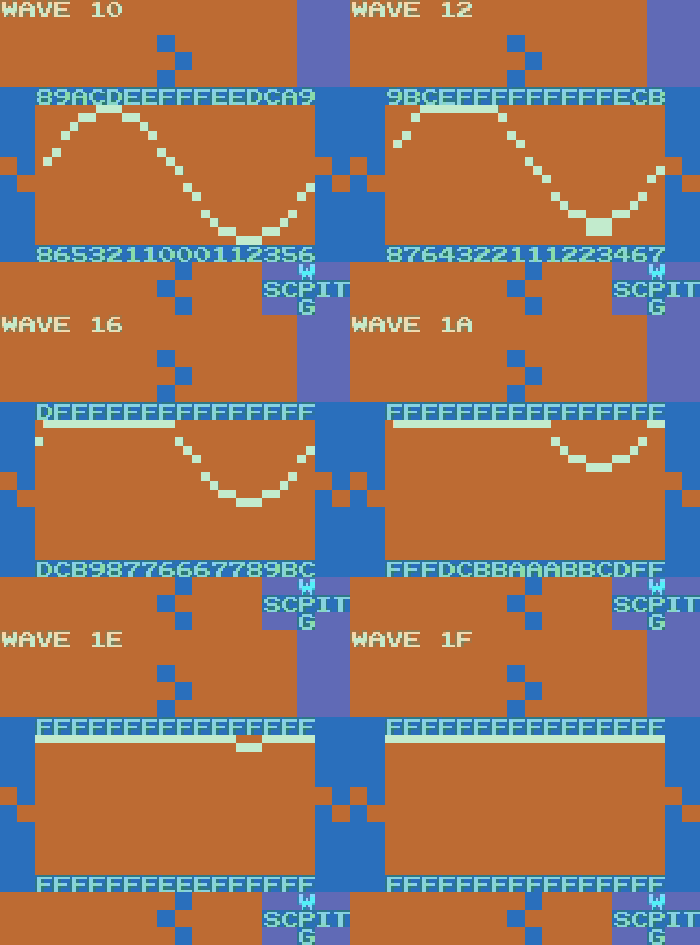
| + | The default Dist type, Clip, chooses to just “clip” those values at 0 and F. It’s as if we just shave the top and the bottom right off. The more we increase the volume of our sine wave, the more and more it starts to look and sound like a square wave. | ||
| + | |||
| + | |||
| + | <center>[[Файл:Intense Tech with Defence Mech 2 - file 7.gif]]<br/><br/> | ||
| + | {{Audio:http://chipwiki.ru/music/intensetechwithdefencemech/2-7.mp3}}</center> | ||
| + | |||
| + | Remember that a square wave adds extra odd overtones to the sine wave sound, so this is one possibility. | ||
| + | |||
| + | The next option, Fold (introduced in version 6), “mirrors” what those volumes would be across the top and bottom. | ||
| + | |||
| + | |||
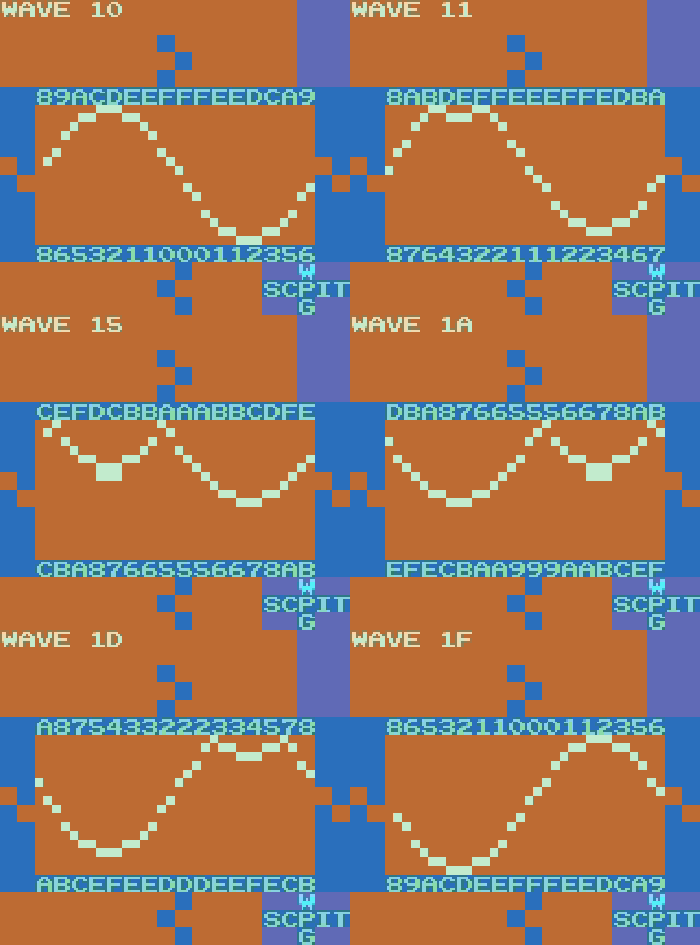
| + | <center>[[Файл:Intense Tech with Defence Mech 2 - file 8.gif]]<br/><br/> | ||
| + | {{Audio:http://chipwiki.ru/music/intensetechwithdefencemech/2-8.mp3}}</center> | ||
| + | |||
| + | Now, instead of chopping off those components of our sine wave that peak over the top and bottom, that “excessive” volume is folded back onto the main waveform. Compared to the deep square-like sound of Clip, this is much higher and more resonant with upper overtones. It’s also quieter than Clip because fewer samples are at the very top and bottom of the dynamic range. However, you could increase the Volume or Q and let the samples fold back and forth multiple times to add more crunch. | ||
| + | |||
| + | The last option, Wrap, will carry any loudness past the top and wrap the next sample upwards from the bottom, and vice versa. Compared to Clip and Fold, it’s characterized by a harshness and buzz in the resulting sound. It tends to be louder than Fold because it distributes more samples evenly throughout the entire dynamic range, although it’s usually not as loud as Clip. | ||
| + | |||
| + | |||
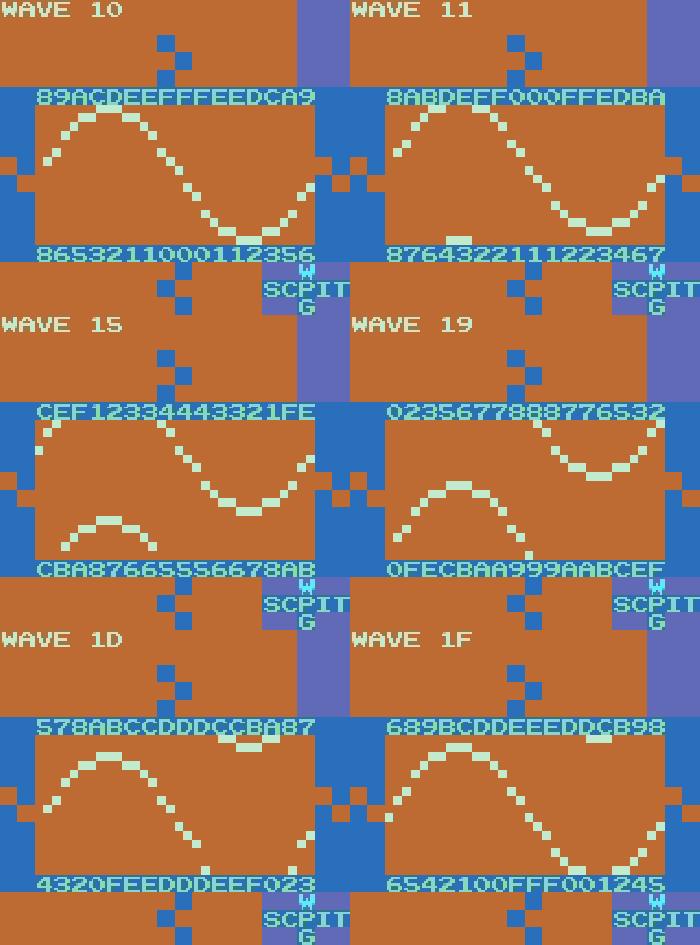
| + | <center>[[Файл:Intense Tech with Defence Mech 2 - file 9.gif]]<br/><br/> | ||
| + | {{Audio:http://chipwiki.ru/music/intensetechwithdefencemech/2-9.mp3}}</center> | ||
| + | |||
| + | When you set Dist to Wrap and increase the volume, many sample values are wrapped repeatedly since they exceed 0-F many times. This creates many instances where samples jump across a large portion of the dynamic range. When you increase Volume or Q, you can cause the waveform to wrap in unpredictable ways, so it may be difficult to dial in a precise sound. You’ll just have to experiment and hear how the various upper overtones will color the sound, but in general it will sound harsh, rich, buzzy, and crunchy. | ||
| + | |||
| + | To recap what we’ve learned so far: | ||
| + | * If your waveform looks like a sine, square, or triangle wave with 1 complete cycle contained entirely within the wave frame, its sound will be clear and smooth. At low octaves it will have plenty of bass. | ||
| + | * The more repetitions of a wave cycle that are within the wave frame, the higher the frequencies will be produced in the resulting notes. The number of repetitions corresponds to the harmonic of the note in the harmonic series that will be produced. | ||
| + | * The more noise that occurs within the wave frame, the less clear it will sound, and the more the sound will be colored by the upper overtones, giving it a buzzier, ringier tone. At low octaves it will have less emphasized bass and a harsher, rougher, crunchier sound. | ||
| + | * Ways of adding higher frequencies include manually adding “notches” into the waveform, setting higher Cutoff values and increasing the Q for emphasis, changing the Phase type and increasing the values, and adding Dist of different types while increasing the Volume or Q. | ||
| + | |||
| + | Alright, so we’ve got a really noisy waveform! Now what? Maybe it’s TOO noisy! What if we like the sound of it, but we want to tame it a bit while still keeping its character mostly intact? | ||
| + | |||
| + | I’m so glad you asked! Another new feature added in version 6 is the ability to Limit the volume AFTER the initial Volume, Cutoff, Q, and Phase are applied. The value applied in Limit restricts the samples to a volume range, for example setting Limit to “F” allows all volumes 0 through F, but setting Limit to “5” only allows volumes 5 through A (10 in hexadecimal), so values that would reach below 5 or above A are kept constrained within that range according to the current Dist type. | ||
| + | |||
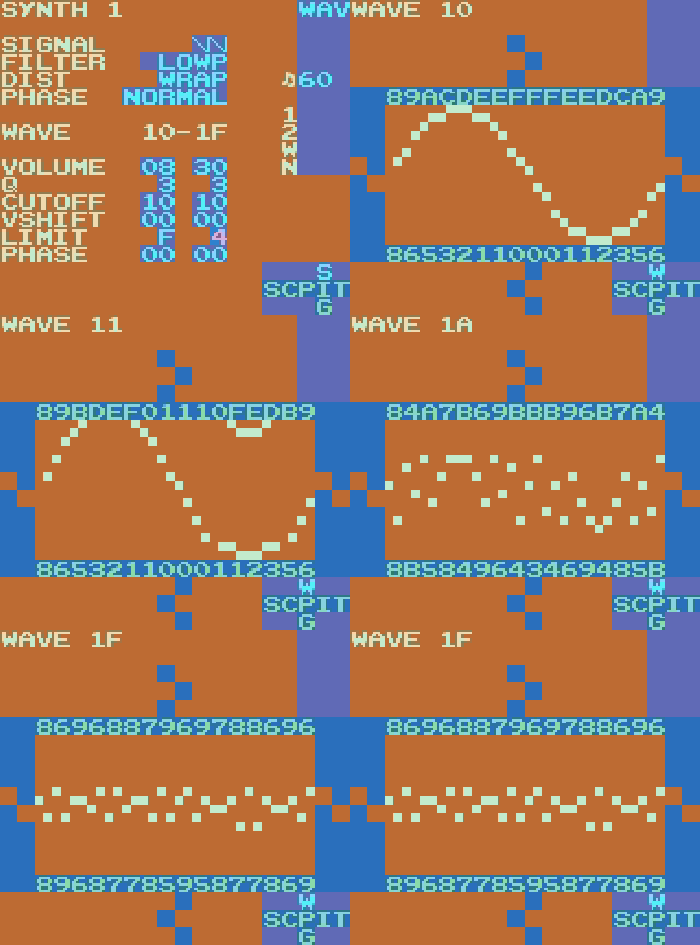
| + | This is an incredibly helpful feature, because as we have seen, it’s easy to reach the maximum available dynamic range in the Wave screen even if our Volume values are set very low. Additionally, the Game Boy doesn’t help us much, because it only allows 4 hardware volumes in the Wave channel: 100%, 50%, 25%, and 0% (off). When we are Clipping or Wrapping our waveforms and constantly reaching volume range all the way from 0-F, the wave channel has the unfortunate tendency of often being too loud at 100% volume but too quiet at 25% or 50%. Thankfully, now we can still choose to distort our waveform to get some richness with added overtones, but with a much fuller control of range of volume. To help us even more, we have the ability to choose one volume range at the Start point and another volume range at the End point. This will let us smoothly transition from loud to quiet or vice versa, as shown here with Limit starting at F and ending at 4. | ||
| + | |||
| + | |||
| + | <center>[[Файл:Intense Tech with Defence Mech 2 - file 10.gif]]<br/><br/> | ||
| + | {{Audio:http://chipwiki.ru/music/intensetechwithdefencemech/2-10.mp3}}</center> | ||
| + | |||
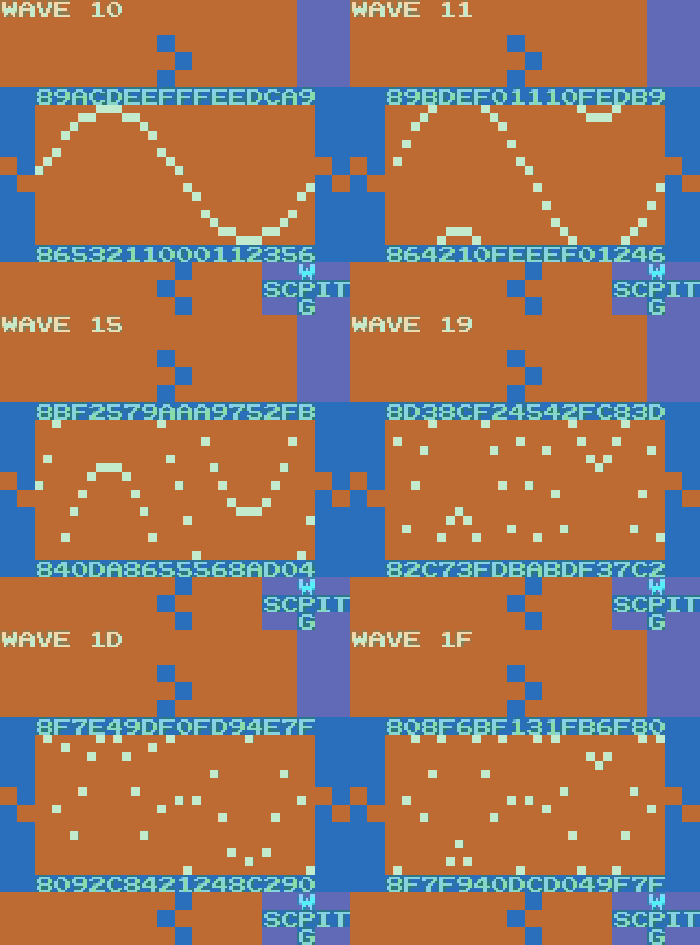
| + | To close, we have the Vshift, or Vertical Shift, feature. This parameter lets us shift the samples in the waveform upwards. In previous versions of LSDj, Vshift functioned similarly to Wrap distortion such that as the waveform shifts vertically, after it reaches F it wraps around starting again at 0. This made it possible to choose Clip Dist, increase volume, and still add wrapping with a change of Vshift to introduce some harsher sounds. Like Wrap, increasing Vshift often results in unpredictable changes, but it can be fun to experiment with. | ||
| + | |||
| + | In version 6 of LSDj, Vshift follows the current Dist setting. With Clip, Vshift will squash the waveform towards the ceiling as the value increases. This, like Fold and Resync2, has the effect of making the waveform quieter. | ||
| + | |||
| + | |||
| + | <center>[[Файл:Intense Tech with Defence Mech 2 - file 11.gif]]<br/><br/> | ||
| + | {{Audio:http://chipwiki.ru/music/intensetechwithdefencemech/2-11.mp3}}</center> | ||
| + | |||
| + | Set to Fold, it will again mirror across the top. With Vshift set to FF, the original wave will be inverted. | ||
| + | |||
| + | |||
| + | <center>[[Файл:Intense Tech with Defence Mech 2 - file 12.gif]]<br/><br/> | ||
| + | {{Audio:http://chipwiki.ru/music/intensetechwithdefencemech/2-12.mp3}}</center> | ||
| + | |||
| + | Set to Wrap, it will wrap around from the bottom. | ||
| + | |||
| + | |||
| + | <center>[[Файл:Intense Tech with Defence Mech 2 - file 13.gif]]<br/><br/> | ||
| + | {{Audio:http://chipwiki.ru/music/intensetechwithdefencemech/2-13.mp3}}</center> | ||
| + | |||
| + | Hopefully by now you’ve gotten a much better grip of how the Wave Synth works in LSDj! I hope this has helped you to fearlessly explore all kinds of options and gives you a good idea of what kind of parameters you need to adjust when looking for a particular sound, but also I hope that it helps you experiment to find a new sound that you haven’t heard before! See you next time! | ||
| + | </spoiler> | ||
==Don’t Sleep on Z== | ==Don’t Sleep on Z== | ||
''Оригинальная статья на [https://chiptuneswin.com/blog/intense-tech-with-defense-mech-dont-sleep-on-z-feat-hypnogram/ chiptuneswin.com]''<br/> | ''Оригинальная статья на [https://chiptuneswin.com/blog/intense-tech-with-defense-mech-dont-sleep-on-z-feat-hypnogram/ chiptuneswin.com]''<br/> | ||
| + | |||
| + | ==Manage your LSDj save files with libLSDj!== | ||
| + | ''Оригинальная статья на [https://chiptuneswin.com/blog/intense-tech-with-defense-mech-manage-your-lsdj-save-files-with-liblsdj/ chiptuneswin.com]''<br/> | ||
| + | |||
| + | [[Категория:LSDJ]] | ||
Версия 09:41, 18 марта 2019
Это руководство к LSDJ
Содержание
LSDj Wave Synth Deep Dive Part 1
Оригинальная статья на chiptuneswin.com
LSDj Wave Synth Deep Dive Part 2
Оригинальная статья на chiptuneswin.com
Don’t Sleep on Z
Оригинальная статья на chiptuneswin.com
Manage your LSDj save files with libLSDj!
Оригинальная статья на chiptuneswin.com
